
Transform Your Home Beautifully

Discover inspiring home ideas, practical tips, and stylish solutions to create a space that feels beautiful, comfortable, and truly yours

About Us

Creating Spaces That Feel Like Home

Welcome to [Your Website Name], a home-focused destination created for people who believe a home should be more than just a place to live—it should be a space that reflects your personality, comfort, and lifestyle.

We’re passionate about sharing practical ideas, inspiring designs, helpful home tips, and thoughtful solutions that make everyday living better. Whether you’re decorating a new space, refreshing a single room, organizing your home, or simply looking for inspiration, we’re here to help you create a place you’ll love.

What We Share

From stylish home décor and interior inspiration to organization ideas, DIY projects, cleaning tips, and everyday home solutions, our goal is to make home improvement feel simple and achievable.

We believe great design doesn’t always require a huge budget or a complete renovation. Sometimes, the smallest changes can make the biggest difference.

Recent Posts
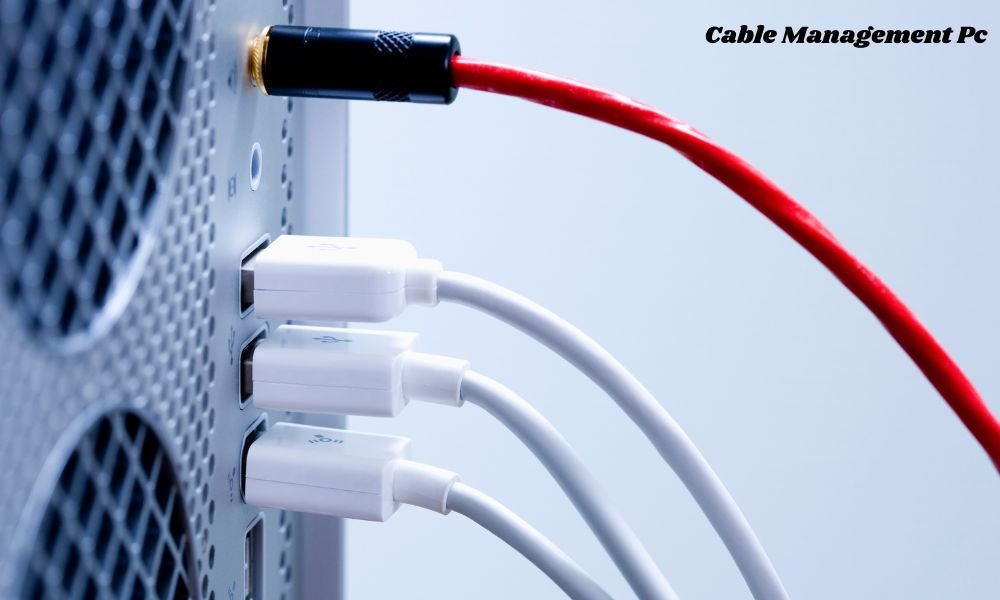
How to do cable management pc Building or upgrading a PC is an exciting experience. However, once all the components are seated in the motherboard, you are often left with a chaotic tangle of wires. Learning how to do cable management PC setups properly is the crucial final step that turns a good build into a clean, professional masterpiece. Beyond just looking neat through a tempered glass side panel, solid cable management improves airflow, keeps dust from accumulating in hard-to-reach spots, and makes future hardware upgrades significantly easier. Why Cable Management Actually Matters It is easy to view cable routing as purely aesthetic, but it serves several practical functions: Improved Airflow: Unrestricted air pathways allow intake fans to push cool air across your GPU and CPU cooler effectively, discharging hot air out the exhaust without obstruction. Easier Maintenance: Dusting out your system with compressed air becomes a quick five-minute task instead of a dusty nightmare. Hardware Safety: Keeping stray wires away from fan blades prevents annoying clicking noises and potential fan motor failure. Stress-Free Upgrades: When it is time to swap out a graphics card or add a new drive, you won't have to untangle a web of unlabeled cords. Essential Tools to Gather Before You Start Before opening your case, gather a few basic supplies. Having these on hand will keep your workflow smooth. Tool / Accessory Purpose Zip Ties or Velcro Straps Securing bundles of cables together tightly. Flush Cutters / Scissors Trimming zip tie ends safely without leaving sharp edges. Twist Ties Temporary holds while planning routes. Adhesive Cable Clips Anchoring stray cables to flat metal surfaces. Pro Tip: Prefer Velcro straps over zip ties where possible. They are reusable and won't accidentally slice into cable insulation if cinched too tightly. Preparing Your Workspace and Components Start with a clean, well-lit surface. Disconnect the power supply from the wall and flip the switch to off before touching anything inside. If you are starting a fresh build, install your CPU, cooler, RAM, and M.2 SSDs onto the motherboard before mounting it into the chassis. Leaving the power supply cables unplugged until the main components are mounted keeps the workspace uncluttered. Understanding Modular vs. Non-Modular Power Supplies Your Power Supply Unit (PSU) plays a massive role in how easy this process will be. Fully Modular PSUs Fully modular power supplies let you plug in only the specific cables your system requires. Unused cables stay in the box, immediately reducing rear-case clutter by 30% to 50%. Non-Modular PSUs All cables are permanently attached to the power supply. If you have a non-modular unit, you will need to stash unused connectors inside the PSU basement shroud or an empty hard drive bay. Route the Main Power Connectors First Always begin with the largest, thickest cables. These dictate where everything else can fit. 24-Pin ATX Motherboard Cable: Feed this through the grommet or cutout directly to the right of your motherboard. 8-Pin EPS (CPU Power) Cable: Route this behind the motherboard tray and bring it out through the top-left cutout of the case before securing top-mounted radiator fans, as space can get tight quickly. Manage PCIe (GPU) Power Cables Modern graphics cards draw significant power and often require multiple 8-pin or 12VHPWR cables. Pull the PCIe cables straight through the cutout beneath the GPU or from the side grommet. Avoid leaving massive loops hanging near the side glass panel. Pull slack back behind the motherboard tray. If using individual sleeve extensions, use cable combs to keep the strands running parallel and clean. Tame Front Panel Headers and Audio Wires Front panel connectors (Power Switch, Reset Switch, HD Audio, USB 3.0, and USB-C) are notoriously thin, fiddly, and visually distracting. Group small front panel pins together using a small wrap of electrical tape or a small zip tie. Pass them through the bottom cutouts of the motherboard tray so they plug directly straight up into their respective headers. Keep the exposed wire length on the front side as short as possible by pulling tension from the back. Storage Drives and SATA Cabling If you are using 2.5-inch SATA SSDs or 3.5-inch hard drives: Mount them in their designated brackets on the back panel or drive cage. Daisy-chain SATA power cables carefully, avoiding sharp 90-degree bends that could damage the connectors. Run flat SATA data cables flat against the back panel to keep the depth slim enough for the side panel to close easily. Master Fan and RGB Daisy-Chaining Cooling fans introduce the highest volume of thin wires, especially with Addressable RGB (ARGB) setups. Group by Location: Combine top intake cables together, front intake cables together, and rear exhaust cables together. Use Fan Hubs or Controllers: Centralizing fan connections into a single PWM controller hidden in the back compartment turns ten loose cables into two manageable main leads (Power and Data). Tuck Excess Length: Wrap excess fan wiring in neat loops and secure them near the fan frame or chassis edges. Utilizing the Back Panel and Tie-Down Points The secret to a pristine PC build lives behind the rear side panel. Identify Anchor Points: Most modern cases feature stamped metal loops meant specifically for zip ties and Velcro straps. Create Main Trunks: Group heavy cables (24-pin, CPU, GPU) into a thick central "trunk" running vertically down the middle of the back tray. Branch Out: Run smaller wires (fans, front panel IO) off the main trunk at 90-degree angles. This grid-like layout prevents a tangled bulk that keeps the side panel from popping back on. Crucial Errors to Avoid To keep your hardware safe and functional, steer clear of these common pitfalls: Over-Tightening Zip Ties: Cinching plastic ties down with excessive force can pinch internal copper wires, leading to intermittent power faults. Bending 12VHPWR Cables Excessively: High-power GPU connectors need at least 35mm of straight clearance before any bend to prevent terminal loose contacts and overheating. Blocking Air Outlets: Ensure leftover bundles stored in the PSU shroud do not completely block the ventilation grilles of the power supply itself. Desk Cable Management: Completing the Setup Once the inside of your tower is tidy, extend the clean aesthetic to your desk space: Use a under-desk cable tray or raceway to route power bricks, monitor cords, and peripheral cables out of sight. Group display cables and PC power cords into a single braided sleeve running down from the rear IO shield to the floor or outlet. Mount power strips underneath the desk surface using heavy-duty mounting tape. Final Thought Mastering how to do cable management PC builds requires patience, planning, and a little bit of practice. It is rarely a process you finish in ten minutes; taking your time to route each wire intentionally makes a world of difference. When you flip the power switch, see your fans spin up smoothly, and slide that clean glass side panel into place, the extra effort pays off completely. A tidy rig runs cooler, lasts longer, and offers a sense of pride every time you sit down to game or work.

How to do cable management pc

Building or upgrading a PC is an exciting experience. However, once all the components are seated in the motherboard, you are often left with a chaotic tangle of wires. Learning how to do cable management PC setups properly is the crucial final step that turns a good build into a clean, professional masterpiece. Beyond just…

Read more
Wall Decor

How to hang wall decor without damaging walls

Transforming a house into a home often comes down to the personal touches you add to your walls. Whether you are living in a rental apartment with a strict security deposit policy, or you simply want the flexibility to rearrange your artwork without filling in drill holes later, hanging decor damage-free is the ultimate solution.…
Read more
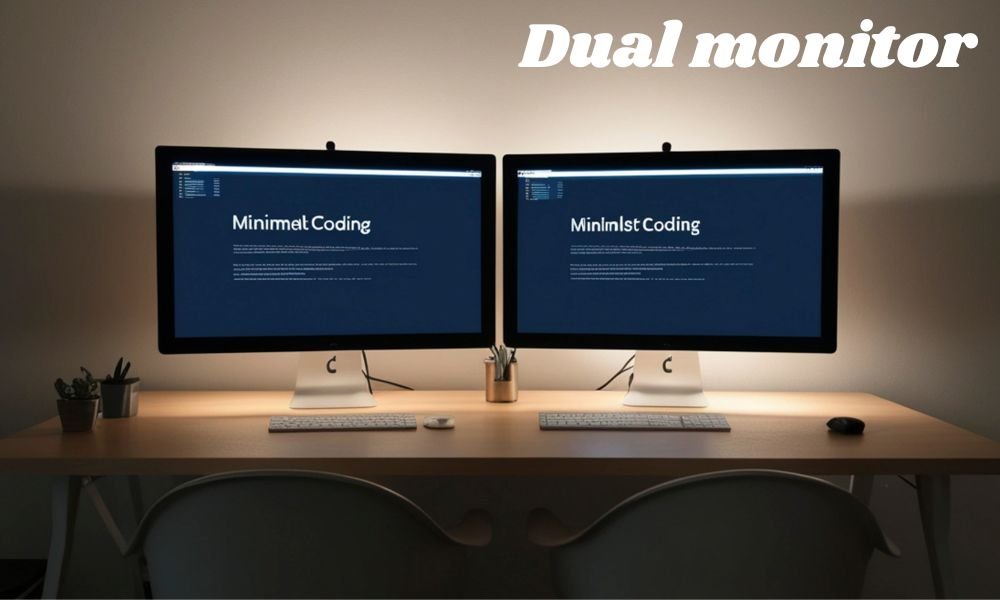
How to use a dual monitor setup In a digital landscape where multitasking is no longer just a perk but a daily necessity, relying on a single display can feel surprisingly limiting. Whether you are toggling between spreadsheet tabs, coding while reviewing technical documentation, or simply streaming a podcast while designing graphics, screen real estate matters. Upgrading to a multi-screen environment is one of the most effective ways to transform your workflow. Here is a comprehensive walkthrough on how to select, connect, configure, and maximize a two-display workstation for peak efficiency. Why Make the Switch? The Power of Extra Screen Real Estate Adding a secondary screen isn't just about modern aesthetics; it fundamentally changes how you interact with software. Enhanced Focus: Instead of constantly switching between overlapping windows using Alt+Tab, your primary application stays front and center while secondary tools sit comfortably nearby. Streamlined Multitasking: Keep reference material open on one side while actively creating or editing content on the other. Reduced Cognitive Load: Having immediate visual access to necessary files reduces the mental friction of constantly searching through minimized tasks. Choosing the Right Displays and Accessories Before plugging anything in, ensure your hardware setup makes sense for your desk space and visual needs. Matching Size, Resolution, and Display Tech While you can technically connect two completely different displays, using screens of identical size and resolution creates a far smoother experience. A pair of 24-inch or 27-inch 1080p or 4K monitors generally hits the sweet spot for office work and media creation. Essential Ergonomic Mounts and Arms Standard desktop monitor stands take up valuable desk space. Investing in a dual-monitor desktop arm allows you to suspend both screens, clear up surface space, and tilt or swivel them precisely to prevent neck and eye strain. Checking Cable Ports and Connectivity The back of your computer or laptop dictates how your hardware connects. Take a quick look at your available ports before buying display cables. Port Type Common Use Key Advantage HDMI Laptops, PCs, TVs Audio and video transmit over a single cable DisplayPort Desktop GPUs, monitors Higher bandwidth, great for high refresh rates USB-C / Thunderbolt Modern laptops Transmits video, data, and power simultaneously Pro-Tip: If your laptop only has a single video output port, consider getting a dedicated laptop docking station. Docking stations expand a single USB-C or Thunderbolt connection into multiple display outputs, standard USB ports, and power delivery. Physical Placement and Desk Ergonomics How you position your displays directly impacts your comfort over long working hours. Identify Your Primary Focal Point: If you use one main display 80% of the time, place it directly in front of you, with the secondary panel off to the side at a gentle angle. If you use both equally, place the inner edges directly in line with your nose. Set the Eyeline Height: Position the top edge of both screens at or slightly below eye level. Maintain Distance: Set screens approximately an arm’s length away to minimize eye fatigue. Configuring Software for Windows and macOS Once connected, your operating system needs to know where each display physically sits on your desk. Setting Up on Windows Right-click anywhere on your desktop and select Display Settings. Click Identify to see which physical monitor is labeled 1 and 2. Drag and drop the screen icons on the layout map so your mouse moves seamlessly from left to right across the border. Under the Multiple displays dropdown, select Extend these displays. Setting Up on macOS Open System Settings and select Displays. Click Arrangement. Drag the display representations so they match your physical setup. Ensure the Mirror Displays box is unchecked so each panel functions as an independent desktop. Advanced Navigation Hacks and Shortcuts Once your hardware is aligned, learning keyboard shortcuts helps you navigate two displays without touching your mouse every few seconds. Windows Key + Left/Right Arrow: Instantly snaps an active window to the left or right half of the active screen. Windows Key + Shift + Left/Right Arrow: Moves an open window directly to the second display. Mac (Option + Green Window Button): Tiles windows easily on macOS layouts. Managing Taskbars and Virtual Desktops Having an identical taskbar or dock on both displays can keep your workflow organized without creating unnecessary clutter. In Windows Display Settings, you can choose whether the taskbar shows all open apps across both screens or only the applications currently residing on that specific screen. On macOS, enabling "Displays have separate Spaces" ensures that full-screening an application on one monitor doesn't turn the other screen black. Troubleshooting Common Dual Monitor Issues Blurry Text on One Screen: Check your resolution settings. Ensure both screens are running at their native pixel resolution rather than an interpolated lower resolution. Mouse Cursor Sticking on Edges: Re-align the display boxes in your display settings menu. If one screen is 4K and the other is 1080p, the mouse path can get caught on the virtual alignment boundary. Display Not Detected: Unplug the display cable, restart your computer, and ensure your graphics drivers are fully updated. Final Thought Transitioning to a two-monitor configuration is one of the most effective upgrades you can make to your daily workspace. It replaces constant tab-swapping with an expansive, intuitive digital canvas that feels natural to navigate. By choosing complementary displays, optimizing your physical ergonomics, and configuring your OS settings correctly, you unlock a cleaner, faster, and far more enjoyable computing environment. Once you get used to the convenience of two screens, returning to a single monitor is a shift you likely won't ever want to make.

How to use a dual monitor setup

In a digital landscape where multitasking is no longer just a perk but a daily necessity, relying on a single display can feel surprisingly limiting. Whether you are toggling between spreadsheet tabs, coding while reviewing technical documentation, or simply streaming a podcast while designing graphics, screen real estate matters. Upgrading to a multi-screen environment is…

Read more
How to Clean a Dishwasher We rely on dishwashers to keep our dishes clean, but it is easy to forget that the machine itself needs regular maintenance. Over time, food particles, soap scum, grease, and mineral deposits build up inside. This buildup can lead to unpleasant odors, poor cleaning performance, and even mechanical issues. Learning how to clean a dishwasher properly keeps your kitchen smelling fresh and extends the lifespan of your appliance. Why Cleaning Your Dishwasher Matters It might seem counterintuitive to clean a machine that runs on soap and hot water every day. However, dishwashers are not self-cleaning. Prevents Unpleasant Odors: Trapped food particles decompose and cause foul smells. Improves Performance: Clean spray arms and filters allow water to flow freely, ensuring spotless dishes. Extends Appliance Lifespan: Removing lime scale and grease reduces wear and tear on internal components. Saves Energy and Water: A clean machine runs more efficiently, using less power to get dishes clean. Signs Your Dishwasher Needs a Deep Clean If you are not sure whether it is time for a scrub, look out for these common warning signs: Persistent bad smells coming from inside the tub. Visible food debris or grime along the door seals or bottom filter. White chalky residue (hard water deposits) on the interior walls or glassware. Water pooling at the bottom of the machine after a cycle. Dishes coming out dirty or covered in grit. Gathering Your Cleaning Supplies Before getting started, collect a few simple household items. You do not need harsh chemicals for routine maintenance. Distilled white vinegar Baking soda Warm, soapy water A soft-bristled brush or old toothbrush A microfiber cloth or sponge A toothpick or paperclip Clear Out the Dishwasher Start with a completely empty machine. Remove the bottom rack so you have easy access to the bottom tub, filter assembly, and heating element. If the top rack is easily removable, take that out as well to give yourself maximum room to work. Remove and Clean the Filter The filter is located at the bottom of the dishwasher tub, usually under the lower spray arm. It traps large food particles to prevent them from clogging the drain. Twist and lift the filter assembly out according to the manufacturer's instructions. Rinse it under warm running water to remove loose debris. Scrub gently with a soft brush and mild dish soap to clear away grease and stubborn grime. Rinse thoroughly and set it aside. Inspect and Clean the Spray Arms Water flows through small nozzles on the upper and lower spray arms. If these tiny holes get blocked by hard water deposits or food bits, water pressure drops significantly. Remove the spray arms if your model allows it (consult your manual). Inspect the holes for any visible clogs. Use a toothpick or paperclip to gently poke out debris trapped in the spray holes. Rinse under running water to clear out any remaining particles, then snap them back into place. Wipe Down the Door Seals and Edges The rubber gasket surrounding the door creates a tight seal, but its folds often collect moisture, soap scum, and mold. Dip a microfiber cloth in warm, soapy water. Carefully wipe down the rubber gasket, taking care to clean inside the folds. Wipe the edges and sides of the door, as well as the control panel, where water and spray do not reach during normal cycles. Run a Hot Vinegar Cycle White vinegar is a natural disinfectant that cuts through grease and dissolves hard water deposits. Place a dishwasher-safe bowl filled with one cup of white distilled vinegar on the top rack of the empty dishwasher. Do not add dishwasher detergent. Run the machine on its hottest, longest cycle. The vinegar will slowly disperse throughout the cycle, breaking down grime and stripping away buildup on internal walls and plumbing. Follow Up with a Baking Soda Cycle After the vinegar cycle finishes, baking soda helps deodorize the machine and scrub away remaining stains. Sprinkle one cup of baking soda evenly across the floor of the empty dishwasher. Run a short, hot-water cycle. This leaves the interior bright, fresh-smelling, and clear of lingering odors. Simple Routine Maintenance Tips Keeping your dishwasher clean is much easier if you maintain it regularly. Adopt these simple habits to prevent heavy buildup: Scrape plates before loading: You do not need to pre-wash every dish, but scraping off large food scraps makes a big difference. Leave the door open after a cycle: Cracking the door open lets moisture escape, reducing mold and mildew growth. Clean the filter monthly: A quick weekly or monthly check prevents major clogs. Use a water softener if needed: If you live in an area with hard water, using dishwasher salt or a water softener helps stop scale formation. Recommended Cleaning Schedule Frequency Maintenance Task Daily / After Use Scrape food scraps off plates; leave the door cracked to dry. Weekly Wipe down the door edges and check the bottom drain for debris. Monthly Remove and wash the filter; run a vinegar and baking soda cycle. Bi-Annually Deep clean spray arms and inspect all rubber seals for wear. Final Thoughts A clean dishwasher is essential for maintaining a hygienic kitchen and ensuring your tableware comes out spotless every time. Taking less than an hour once a month to wash the filter, clear the spray nozzles, and run a vinegar cycle pays off in performance and longevity. By keeping up with simple preventive care, you protect your appliance investment and enjoy fresh, gleaming dishes for years to come.

How to Clean a Dishwasher

We rely on dishwashers to keep our dishes clean, but it is easy to forget that the machine itself needs regular maintenance. Over time, food particles, soap scum, grease, and mineral deposits build up inside. This buildup can lead to unpleasant odors, poor cleaning performance, and even mechanical issues. Learning how to clean a dishwasher…

Read more
How tall should nightstands be Finding the right furniture for your bedroom often feels like a balancing act between aesthetics and daily functionality. While choosing a frame or choosing a cozy duvet cover gets most of the attention, the humble nightstand plays a crucial role in how well your bedroom works on a practical level. One question comes up far more often than you might think: how tall should nightstands be? Pick a table that is too tall, and you will find yourself reaching awkwardly upward in the dark just to hit snooze on your alarm. Choose one that is too short, and you risk knocking over your glass of water every time you reach out from under the covers. Getting this dimension right creates visual balance and ensures effortless comfort every single night. The Golden Rule of Nightstand Height If you are looking for a straightforward benchmark, interior designers rely on one primary rule of thumb: Your nightstand should sit level with the top of your mattress, or within 2 to 4 inches higher. In an ideal layout, your hand should glide sideways from the bed straight onto the tabletop. When your bedside table aligns closely with your mattress height, turning off a lamp, grabbing a book, or picking up your phone requires almost zero physical effort. While matching the exact height of your mattress provides the cleanest look, staying within that 2 to 4-inch margin above the mattress line is completely acceptable—and often preferable if you like reading while sitting up in bed. Typical Standard Nightstand Measurements Most off-the-shelf bedside tables fall within a standard range: Standard Height: 24 to 28 inches Standard Width: 18 to 24 inches Standard Depth: 16 to 20 inches Because most traditional bed setups (including a standard frame, box spring, and mattress) measure around 25 to 27 inches tall, the furniture industry builds most nightstands to meet that mid-range height. However, modern bed designs vary wildly today. A low-profile platform bed sits much closer to the rug than a traditional pillow-top setup on a box spring, meaning a "standard" 26-inch nightstand won't suit every room. How to Measure Your Mattress Height Accurately Before you start browsing through online stores or furniture showrooms, grab a tape measure. You need to know the exact height of your specific sleeping setup. Step 1: Set Up Your Complete Bed Make sure your bed frame, box spring (if you use one), mattress, and any extra mattress toppers are completely assembled. Mattress toppers add real height, so do not skip this step! Step 2: Measure from the Floor Place your tape measure flat against the floor right beside your bed. Pull the tape up to the top surface of your mattress, keeping the line straight. Step 3: Record Your Target Range Note down the total inches from the floor to the top edge of your mattress. This total is your baseline. Your ideal nightstand height: Equal to your measurement. Your maximum nightstand height: Your measurement + 2 to 4 inches. Your minimum nightstand height: Your measurement - 1 to 2 inches (if necessary). Matching Nightstands to Different Bed Types To keep your proportions spot-on, match your nightstand's profile to the structure of your bed frame. 1. Platform Beds and Low-Profile Frames Platform beds eliminate the box spring, sitting much closer to the ground. Average Bed Height: 18 to 22 inches Recommended Nightstand Height: 18 to 24 inches Vibe: Sleek, mid-century modern, or Scandinavian minimalist. 2. Traditional and Standard Beds Standard metal or wooden bed frames with a box spring and medium mattress. Average Bed Height: 23 to 27 inches Recommended Nightstand Height: 24 to 28 inches Vibe: Classic, transitional, or cozy farmhouse. 3. Extra-Tall, Pillow-Top, or Canopy Beds Plush setups featuring thick pillow-top mattresses or elevated storage bases. Average Bed Height: 28 to 34 inches Recommended Nightstand Height: 28 to 32 inches Vibe: Grand, luxurious, or traditional master suite. Quick Reference Guide Bed Type Distance from Floor to Mattress Top Ideal Nightstand Height Range Low-Profile / Platform 18" – 22" 18" – 24" Standard Setup 23" – 27" 24" – 28" Tall / Pillow-Top / Canopy 28" – 32"+ 28" – 32" Is It Better for a Nightstand to Be Taller or Shorter? If you cannot find a bedside table that matches your exact mattress height, you face a common choice: go slightly taller or slightly shorter? Why Slightly Taller Works Better If you have to choose between a nightstand that is 3 inches too tall or 3 inches too short, choose the taller option. A nightstand that sits slightly above your mattress prevents items like glasses or water bottles from getting accidentally swept off the table by your pillows or duvet. It is also physically easier to reach sideways and slightly up than it is to drop your shoulder down to reach a table that sits below the mattress edge. The Downside of a Shorter Nightstand When a nightstand sits significantly lower than your mattress, reaching down in the dark strains your back and shoulder muscles. It also creates a visual "drop-off" that makes your bed appear disproportionately large for the rest of the bedroom furniture. Calculating Overall Visual Scale and Proportions Height is the most crucial functional factor, but width and depth keep your bedroom looking balanced. Width Matters for Proportions For a Twin or Full bed, aim for a nightstand around 18 to 20 inches wide. For a Queen bed, aim for 20 to 28 inches wide. For a King or California King bed, look for wide nightstands between 28 to 36 inches to balance out the expansive headboard. Mind the Depth Keep the depth of your nightstand around 16 to 20 inches. If a nightstand is deeper than 22 inches, getting in and out of bed becomes awkward because the front edge of the table sticks out past your mattress line. Lighting, Sconces, and Wall-Mounted Tables Your nightstand height also dictates where you put your bedside lighting. Table Lamps: When sitting up in bed, the lower rim of your lampshade should rest right at eye level. This prevents the bare light bulb from glaring directly into your eyes while reading. Wall Sconces: If you prefer wall-mounted lights to free up surface space, install them so the light fixture hangs roughly 30 to 36 inches above the top of your mattress. Floating Nightstands: Wall-hung nightstands are great for tiny bedrooms. Mount them so the top shelf sits precisely flush with the top of your mattress. Common Sizing Mistakes to Avoid Buying Furniture in Sets Without Measuring: Just because a nightstand is sold in a bedroom suite does not guarantee it matches your specific mattress thickness. Always check the total mattress-to-floor height first. Ignoring Mattress Toppers: Adding a 3-inch memory foam topper later on changes your entire calculation. Always measure your bed with all bedding and toppers in place. Placing the Table Too Close to the Frame: Leave about 2 to 3 inches of clearance between the side of your mattress and the edge of your nightstand. This gives you room to tuck in your sheets and blankets without jamming your fingers. Final Thought When asking yourself how tall should nightstands be, keep comfort and proportions at the top of your mind. A bedside table should bring harmony to your bedroom design while making your evening and morning routines as seamless as possible. Stick to the classic designer rule of thumb: aim for a height that matches your mattress surface or sits just a couple of inches above it. Once you have that measurement locked down, you can comfortably choose colors, drawer styles, and finishes that express your personal taste!

How tall should nightstands be

Finding the right furniture for your bedroom often feels like a balancing act between aesthetics and daily functionality. While choosing a frame or choosing a cozy duvet cover gets most of the attention, the humble nightstand plays a crucial role in how well your bedroom works on a practical level. One question comes up far…
Read more
Home

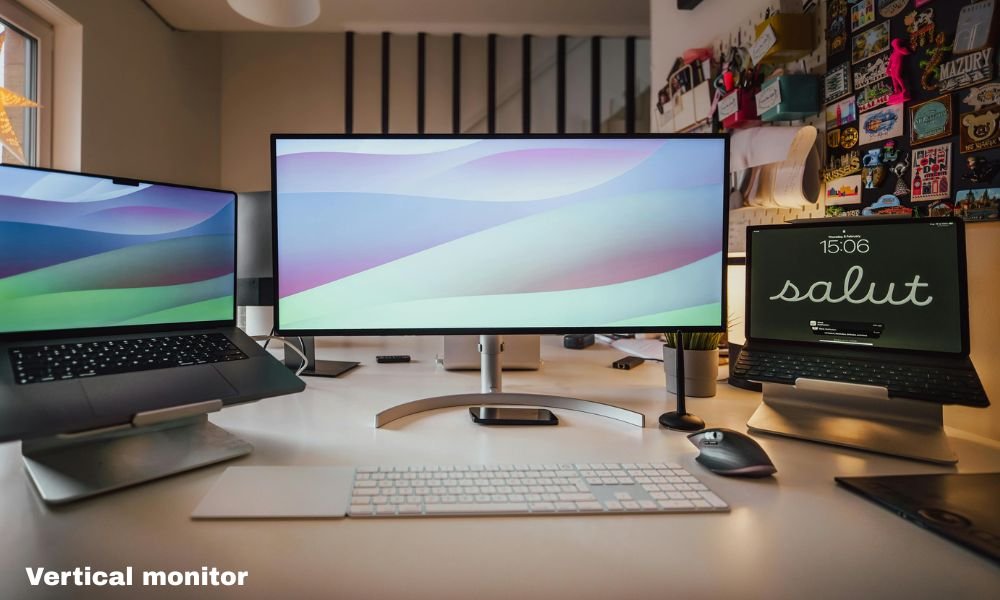
How to setup vertical monitor

If you have ever caught yourself constantly scrolling through endless lines of code, long-form documents, or crowded social media feeds, you know the struggle of standard horizontal screens. A widescreen is fantastic for movies and gaming, but for focused, vertical content, it leaves a lot of empty space on the sides while squeezing what actually…
Read more
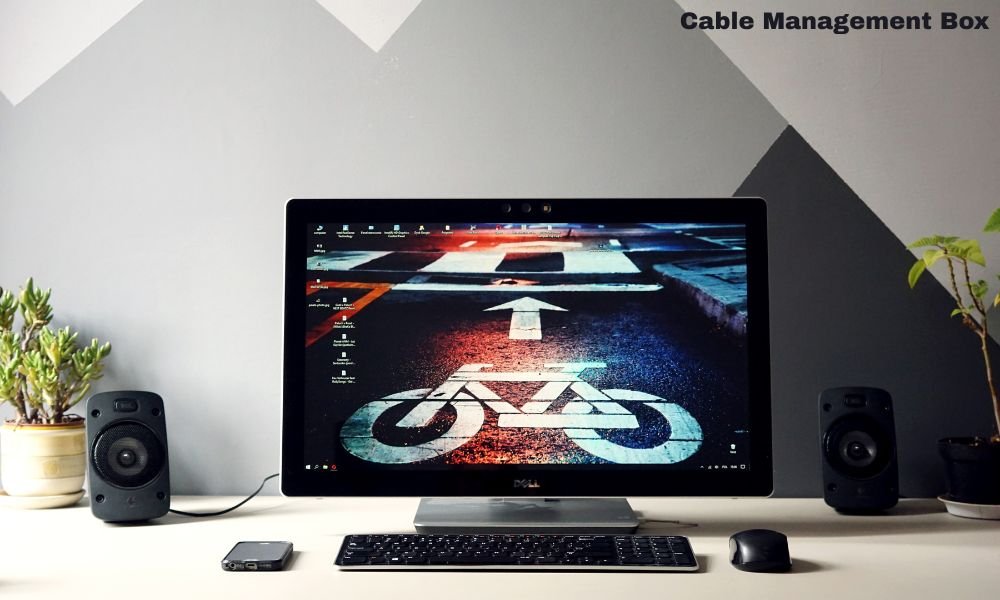
Best cable management box We have all been there. You look down behind your desk, TV stand, or bedside table, and you are greeted by a chaotic nest of tangled wires, dusty surge protectors, and bulky power adapters. It does not just look messy; it creates a daily source of visual friction in your living or working space. Thankfully, you do not need to rewire your entire home or become an electrician to solve this. A best cable management box offers a simple, stylish, and effective way to hide that clutter instantly. Let's walk through how these sleek containers work, what features matter most, and how to choose the right option for your space. Why You Need a Cable Management Box in Your Setup A cable management box does much more than just cover up an eyesore. It transforms the functionality and safety of your room. Instant Aesthetic Upgrade: Hiding cluttered surge protectors creates a clean, minimalist look across desks and entertainment units. Child and Pet Safety: Exposed power strips tempt curious pets who might chew on wires and toddlers who love grabbing loose cords. Easier Cleaning: Sweeping or vacuuming around individual cords is frustrating. A single closed box lets you dust in seconds. Reduces Fire and Damage Risks: Piling cords together on the floor traps dust, which acts as a fire hazard near hot power adapters. How a Cable Management Box Works At its core, a cable box acts as a protective shield for your power strip and messy lengths of excess wire. You place your power strip inside the box, plug in your devices, and thread the cords through side cutouts or slots. The lid snaps shut over the entire bundle. You are left with a single, streamlined container sitting neatly against your wall or under your desk, while all the ugly routing stays completely hidden inside. Key Features to Look For Before Buying Not all organizer boxes are created equal. Before picking one, keep these core features in mind: 1. Size and Inner Capacity Always measure your power strip before buying. You need a box wide and deep enough to accommodate not only the strip itself, but also bulky power bricks (like laptop chargers) plugged into it. 2. Ventilation and Heat Management Power adapters generate heat. Look for boxes with ventilated bottoms or side slats that allow air to circulate freely and prevent overheating. 3. Material and Build Quality High-quality ABS plastic is flame-retardant, durable, and easy to wipe clean. If you want something more decorative, look for options featuring real bamboo lids or solid wood finishes. 4. Entry and Exit Cutouts Multiple cord cutouts on the sides, top, or back give you the flexibility to route cables in different directions without bending or strain. Top Cable Management Box Styles to Consider Depending on your room's aesthetic and practical needs, several popular box styles stand out: Style Category Best For Standout Features Minimalist Matte ABS Home offices & modern desks High durability, sleek look, flame-retardant plastic Decorative Bamboo Lid Living rooms & bedside tables Blends with furniture, stylish natural wood finish Under-Desk Mounted Standing desks & gaming setups Keeps floor completely clear, screws or clamps on Multi-Size Value Sets Whole-home organization Comes with small, medium, and large matching boxes Step-by-Step Guide: Setting Up Your Organizer Box Getting the cleanest look takes just a few minutes of prep work: Unplug Everything: Start with a blank slate so you can untangle existing wires completely. Place the Strip First: Set your surge protector flat inside the box. Route Main Cables: Thread power cables through the side slots before plugging them in. Use Cable Ties Inside: Coil excess cord lengths tightly inside the box using reusable velcro straps. Close the Lid: Snap or rest the lid on top, routing charging cords through top access ports if available. Common Mistakes to Avoid To get the safest and cleanest setup, avoid these quick pitfalls: Overcrowding the Box: Never force too many thick cords into a small box. Air needs space to move. Ignoring Heavy Power Bricks: Account for height! Large transformers can prevent the box lid from closing flush. Forgetting Cable Labels: Label your cords inside the box so you do not have to unplug everything later just to find one wire. Fainal Though Tackling cord clutter is one of the easiest ways to upgrade your space without spending a fortune. Investing in the best cable management box for your home or office gives you immediate peace of mind, protects your electronics from dust and pets, and creates a clean environment where you can actually focus. Take a minute to measure your power strips, pick a style that matches your room, and enjoy a clutter-free room today.

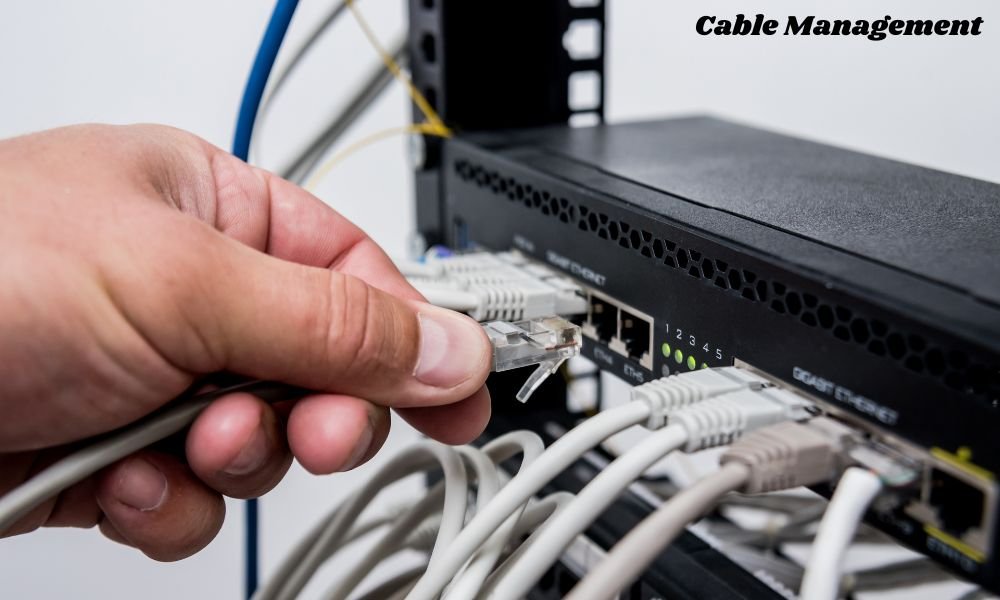
How to do cable management

We have all been there. You set up a brand-new desk, plug in your computer, monitor, speakers, and chargers, and step back to admire your work—only to realize the space under your desk looks like a nest of electric snakes. Messy cables are more than just an eyesore. They trap dust, make cleaning a nightmare,…
Read more
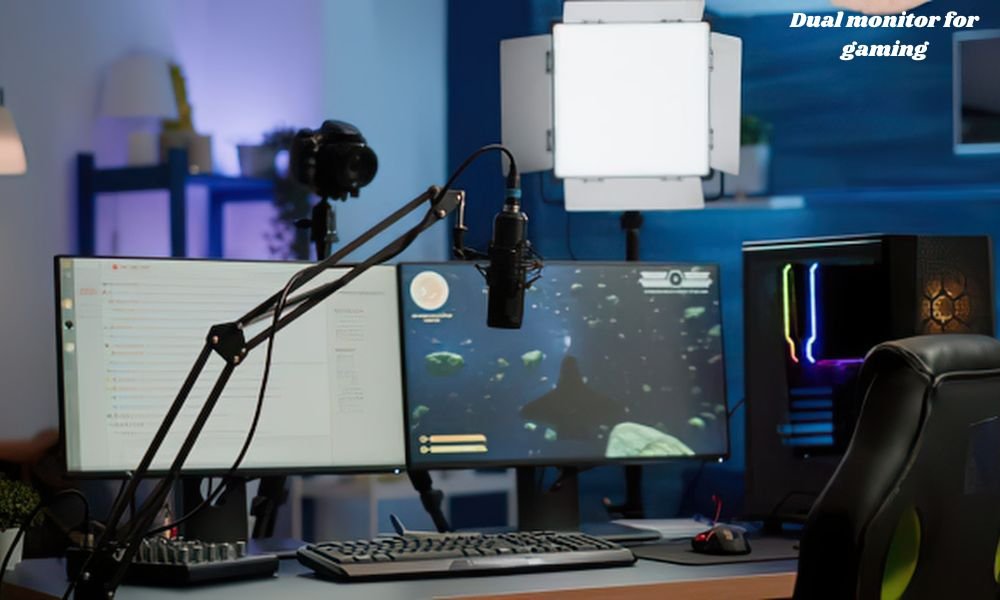
How to setup dual monitor for gaming Setting up a dual monitor display for gaming is one of the most effective ways to upgrade your desktop experience. Whether you want to stream games while keeping an eye on chat, manage Discord without alt-tabbing, or simply multitask while waiting in game lobbies, adding a second screen transforms how you play and work. Here is a complete, step-by-step guide to setting up a dual monitor rig cleanly and efficiently. Plan Your Desk Space and Layout Before plugging in cables, look at your physical setup. Desk Depth and Width: Measure your desk to ensure two screens fit comfortably without crowding your mouse space. Ergonomics: Place your primary gaming monitor directly in front of your natural eye line. The secondary monitor should sit slightly angled toward you on either the left or right side. Monitor Mounts vs. Stand: If desk space is tight, consider a dual-monitor arm (desk clamp or wall mount) to free up surface area beneath the screens. Check GPU Ports and Cable Compatibility Your graphics card (GPU) dictates what kind of displays you can run. Inspect Your Graphics Card: Look at the back of your PC tower. A standard modern GPU features a mix of DisplayPort (DP) and HDMI ports. Select the Best Cable for Gaming: * Use DisplayPort for your primary gaming monitor whenever possible. It supports higher refresh rates (144Hz, 240Hz, etc.) and adaptive sync technologies like G-Sync and FreeSync. Use HDMI or DisplayPort for your secondary monitor, where refresh rates are generally less critical. Avoid Motherboard Connections: Ensure both monitors connect directly to your dedicated GPU, not the motherboard ports near the USB slots (unless you are intentionally using integrated graphics). Position and Mount Your Screens Once your workspace is ready, physically position both screens. Primary Screen: Align it directly center-stage. This is where your full-screen games will run. Secondary Screen: Place it on your dominant side or whichever side has cleaner cable routes. Angle it inward by roughly 15 to 30 degrees for easy viewing without excessive neck strain. Cable Management: Thread power and display cables behind the desk or along monitor arms to keep the setup clutter-free. Plug In and Power Up Connect both monitors to power outlets and plug their display cables into your GPU. Turn on the screens, then boot up your PC. Windows usually detects the second monitor automatically, though it may initially mirror your primary desktop rather than extending it. Configure Windows Display Settings To make your two monitors behave like a cohesive desktop, configure your display settings in Windows: Right-click anywhere on your desktop and select Display settings. Under the Rearrange your displays section, click Identify to see which screen is assigned as Monitor 1 and Monitor 2. Click and drag the screen icons in the menu so their virtual positions match their physical locations on your desk. Scroll down to Multiple displays and select Extend these displays. Set Your Primary Monitor and Refresh Rates To ensure your games automatically launch on your best display: In Display settings, select the monitor meant for gaming. Scroll down and check the box marked Make this my main display. Click Advanced display settings for the gaming screen. Locate Choose a refresh rate and select the highest option your monitor supports (e.g., 144Hz, 165Hz, or 240Hz). Fine-Tune GPU Control Panels (NVIDIA / AMD) For granular control over colors, resolution, and adaptive sync technology, open your GPU’s control panel. NVIDIA Control Panel Go to Display > Change resolution to verify high refresh rates and resolution. Go to Set up G-SYNC to enable adaptive sync for seamless gaming. AMD Software: Adrenalin Edition Navigate to Gaming > Display to enable AMD FreeSync. Adjust color temperature or display scaling settings individually for each panel. Calibrate Colors and Match Display Settings If your two monitors are different models or brands, the colors, brightness, and contrast will likely look different. Use Physical OSD Buttons: Access the built-in menus on both monitors to balance brightness and contrast levels. Match Color Temperature: Set both displays to the same preset (such as "Warm" or "User/Custom") to prevent eye fatigue when switching glances between screens. Choose the Right In-Game Display Mode How your games run can impact how easy it is to use your second screen while playing. Game Display Mode Pros Cons Exclusive Fullscreen Best performance, lowest input lag Screen flickers or minimizes when clicking onto the second monitor Borderless Windowed Seamless mouse movement to second monitor without tab delays Slight, often unnoticeable hit to FPS depending on system hardware Windowed Easy to resize Visible window borders, immersion loss Recommendation: Use Borderless Windowed mode for casual or multitasking-heavy games, and Exclusive Fullscreen for competitive games where every millisecond of input latency counts. Useful Software for Dual-Monitor Gamers Managing two screens gets much easier with the right software tools: DisplayFusion: Offers advanced taskbar customization, monitor profiles, and wallpaper management across multiple screens. Borderless Gaming: Forces older games that lack a native borderless option to run cleanly without borders. PowerToys (FancyZones): A Microsoft utility that allows you to create custom grid layouts for snapping windows on your secondary display. Troubleshooting Common Dual-Monitor Issues Cursor Drifts to Second Monitor During Gameplay: Ensure your game is set to Fullscreen, or use tools like Cursor Lock to keep the mouse bound to the active screen. FPS Drops or Stuttering: Running intensive video software on the secondary screen while gaming can occasionally cause frame dips. Disabling hardware acceleration in web browsers or Discord often resolves this. Screen Wakes Up with Misaligned Windows: Make sure both display cables are plugged securely into the GPU and that Windows display scale settings match across both panels if possible. Final Thoughts Setting up a dual monitor array for gaming strikes a great balance between functionality and immersion. Once physical positioning, Windows settings, and refresh rates are properly configured, having extra screen real estate makes managing background tasks, communication apps, and content creation seamless. With a clean layout and simple display tweaks, a multi-monitor rig becomes an indispensable part of any modern desktop experience.

How to setup dual monitor for gaming

Setting up a dual monitor display for gaming is one of the most effective ways to upgrade your desktop experience. Whether you want to stream games while keeping an eye on chat, manage Discord without alt-tabbing, or simply multitask while waiting in game lobbies, adding a second screen transforms how you play and work. Here…
Read more
Best cable management box We have all been there. You look down behind your desk, TV stand, or bedside table, and you are greeted by a chaotic nest of tangled wires, dusty surge protectors, and bulky power adapters. It does not just look messy; it creates a daily source of visual friction in your living or working space. Thankfully, you do not need to rewire your entire home or become an electrician to solve this. A best cable management box offers a simple, stylish, and effective way to hide that clutter instantly. Let's walk through how these sleek containers work, what features matter most, and how to choose the right option for your space. Why You Need a Cable Management Box in Your Setup A cable management box does much more than just cover up an eyesore. It transforms the functionality and safety of your room. Instant Aesthetic Upgrade: Hiding cluttered surge protectors creates a clean, minimalist look across desks and entertainment units. Child and Pet Safety: Exposed power strips tempt curious pets who might chew on wires and toddlers who love grabbing loose cords. Easier Cleaning: Sweeping or vacuuming around individual cords is frustrating. A single closed box lets you dust in seconds. Reduces Fire and Damage Risks: Piling cords together on the floor traps dust, which acts as a fire hazard near hot power adapters. How a Cable Management Box Works At its core, a cable box acts as a protective shield for your power strip and messy lengths of excess wire. You place your power strip inside the box, plug in your devices, and thread the cords through side cutouts or slots. The lid snaps shut over the entire bundle. You are left with a single, streamlined container sitting neatly against your wall or under your desk, while all the ugly routing stays completely hidden inside. Key Features to Look For Before Buying Not all organizer boxes are created equal. Before picking one, keep these core features in mind: 1. Size and Inner Capacity Always measure your power strip before buying. You need a box wide and deep enough to accommodate not only the strip itself, but also bulky power bricks (like laptop chargers) plugged into it. 2. Ventilation and Heat Management Power adapters generate heat. Look for boxes with ventilated bottoms or side slats that allow air to circulate freely and prevent overheating. 3. Material and Build Quality High-quality ABS plastic is flame-retardant, durable, and easy to wipe clean. If you want something more decorative, look for options featuring real bamboo lids or solid wood finishes. 4. Entry and Exit Cutouts Multiple cord cutouts on the sides, top, or back give you the flexibility to route cables in different directions without bending or strain. Top Cable Management Box Styles to Consider Depending on your room's aesthetic and practical needs, several popular box styles stand out: Style Category Best For Standout Features Minimalist Matte ABS Home offices & modern desks High durability, sleek look, flame-retardant plastic Decorative Bamboo Lid Living rooms & bedside tables Blends with furniture, stylish natural wood finish Under-Desk Mounted Standing desks & gaming setups Keeps floor completely clear, screws or clamps on Multi-Size Value Sets Whole-home organization Comes with small, medium, and large matching boxes Step-by-Step Guide: Setting Up Your Organizer Box Getting the cleanest look takes just a few minutes of prep work: Unplug Everything: Start with a blank slate so you can untangle existing wires completely. Place the Strip First: Set your surge protector flat inside the box. Route Main Cables: Thread power cables through the side slots before plugging them in. Use Cable Ties Inside: Coil excess cord lengths tightly inside the box using reusable velcro straps. Close the Lid: Snap or rest the lid on top, routing charging cords through top access ports if available. Common Mistakes to Avoid To get the safest and cleanest setup, avoid these quick pitfalls: Overcrowding the Box: Never force too many thick cords into a small box. Air needs space to move. Ignoring Heavy Power Bricks: Account for height! Large transformers can prevent the box lid from closing flush. Forgetting Cable Labels: Label your cords inside the box so you do not have to unplug everything later just to find one wire. Fainal Though Tackling cord clutter is one of the easiest ways to upgrade your space without spending a fortune. Investing in the best cable management box for your home or office gives you immediate peace of mind, protects your electronics from dust and pets, and creates a clean environment where you can actually focus. Take a minute to measure your power strips, pick a style that matches your room, and enjoy a clutter-free room today.

How to setup dell monitor

Upgrading your workspace with a crisp, reliable display is one of the most effective ways to boost productivity, improve ergonomics, and enhance your digital experience. Dell monitors are widely celebrated for their color accuracy, build quality, and versatile connectivity. However, taking a monitor out of its box and getting it to perform at its best…
Read more
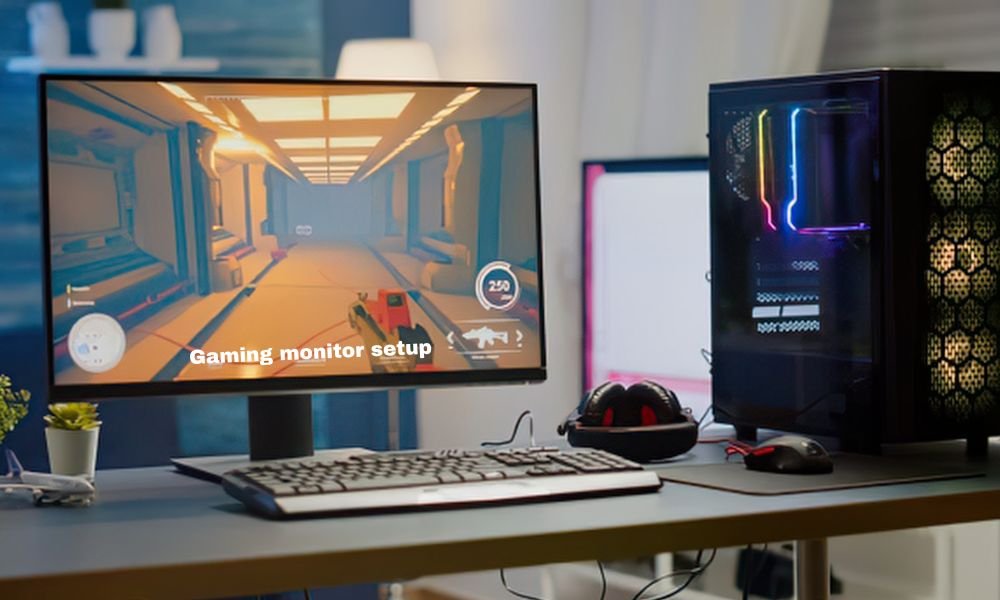
Gaming monitor setup ideas A great display means very little if it sits on a cluttered, uncomfortable desk. Setting up your screen properly is about more than just plugging in a cable; it directly affects your posture, focus, and overall experience. Whether you want to climb ranked ladders or sink into massive open worlds, having an organized, comfortable space makes a noticeable difference. Designing an effective layout requires balancing panel specs, mounting options, lighting, and cable control. Here is a practical guide to building a clean, high-performance display layout that fits your space and playstyle. Choosing the Right Monitor Foundation Before mounting or decorating, make sure your primary display matches the games you actually play. Esports & Fast Shooters: A 24-to-27-inch 1080p or 1440p panel with high refresh rates (4\text{ Hz}$ to 0\text{ Hz}$) keeps action crisp without forcing your eyes to track across a huge surface. Immersive & RPG Gaming: A 32-inch 4K screen or a 34-inch ultrawide offers deep contrast and rich detail, pulling you right into the game world. Minimalist Single-Monitor Clean Build If you like a distraction-free space, a single-screen layout focused on clean lines works best. Keep your desktop clear by mounting the display on an adjustable gas-spring arm. Place your PC tower on a dedicated floor stand or a side shelf to maximize desk surface. Use a extended desk pad to tie your keyboard, mouse, and display base together visually. Dual-Monitor Layout for Streamers and Multitaskers Running two displays is standard for anyone who streams, chats on Discord, or manages background apps while gaming. Primary Screen: Position your main display directly in front of you at eye level. Secondary Screen: Angle your second panel slightly inward (^\circ$ to ^\circ$) on your non-dominant side to reduce neck strain. Vertical Orientation: Turn your second display sideways (portrait mode) if you read long chat feeds, code, or keep documents open. Immersive Ultrawide and Super-Ultrawide Layouts Ultrawide (:9$) and super-ultrawide (:9$) screens give you expansive field-of-view without the center bezels that come with multi-screen builds. Tip: Due to their extra weight, standard factory stands take up significant desk depth. Use a heavy-duty, high-capacity monitor arm to lift the screen and free up space beneath it. Vertical Stacked Monitor Layout When horizontal desk space is limited, stacking displays vertically is an efficient alternative. Mount the main screen at direct eye level. Tilt the upper screen downward slightly so you can view it comfortably without leaning back. This layout works exceptionally well for flight simulators, racing rigs, and compact desk areas. Ergonomics: Finding the Right Angle and Height Proper physical alignment prevents neck and eye strain during long gaming sessions. Eye Line: The top third of your display should line up with your natural eye level when sitting up straight. Distance: Keep the screen roughly an arm’s length away (around 20 to 30 inches). Tilt: Angle the screen back slightly (^\circ$ to ^\circ$) to match your natural line of sight. Cable Management Solutions Tangled wires quickly spoil the look of any setup. Hiding cords takes a little effort upfront, but it keeps your workspace tidy. Run display and power cables inside the built-in channels of your monitor arm. Mount a wire basket or raceway under your desk to hold power strips and power bricks. Bundle loose cords together using reusable fabric straps or spiral sleeves. Bias Lighting and Ambient RGB Integration Bright screens in dark rooms can strain your eyes. Adding balanced background lighting creates a comfortable contrast level. Attach neutral white (00\text{K}$) LED light strips directly behind your display to project soft light onto the wall. Sync smart ambient lighting to your screen colors for dynamic background glow during gameplay. Avoid placing strong light sources directly behind your chair to prevent screen glare. Mounting Solutions: Desk Clamp vs. Wall Mount Deciding how to support your displays comes down to your room layout and desk material. Mount Type Best Used For Key Advantage Desk Clamp Arm Standard wood or metal desks Easy to reposition and move later Wall Mount Shallow desks or ultra-heavy displays Frees up 0\%$ of desk surface Grommet Mount Desks with pre-drilled cable holes Maximum stability for heavy setups Audio and Accessories Placement Keep your sound equipment accessible without cluttering your main viewing area. Mount desktop speakers on small elevated stands so the tweeters point toward ear level. Use an under-desk hook or a side stand to hang your headset when it is not in use. Place your microphone on an adjustable boom arm clamped to the side of the desk rather than right in front of the screen. Setting Display Refresh Rates and Resolution Plugging in a high-refresh display does not always mean it runs at top performance automatically. Open your operating system’s Display Settings. Go to Advanced Display and manually select the maximum refresh rate available (e.g., 4\text{ Hz}$ or 0\text{ Hz}$). Enable Variable Refresh Rate features like G-Sync or FreeSync in your GPU control panel to eliminate screen tearing. Final Thoughts Building the ideal gaming monitor setup is an ongoing process of tweaking comfort, aesthetics, and performance. Start by getting your primary display positioned correctly for your posture, secure your cables out of sight, and layer in ambient lighting to reduce eye fatigue. When your display layout is comfortable and organized, you can focus entirely on enjoying your games.

Gaming monitor setup ideas

A great display means very little if it sits on a cluttered, uncomfortable desk. Setting up your screen properly is about more than just plugging in a cable; it directly affects your posture, focus, and overall experience. Whether you want to climb ranked ladders or sink into massive open worlds, having an organized, comfortable space…
Read more
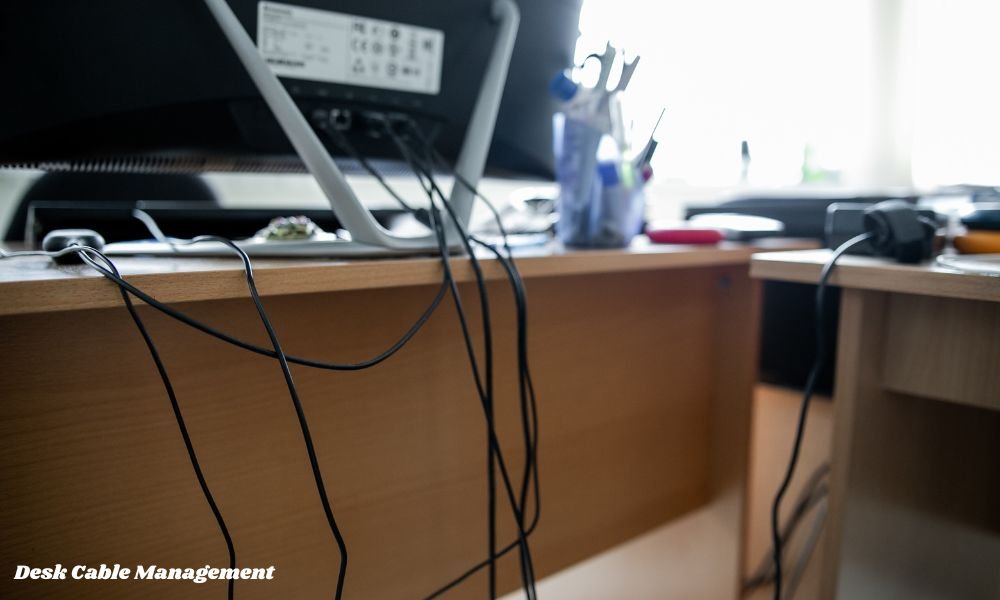
The Ultimate Guide to Desk Cable Management We have all been there. You spend hours picking out the perfect desk, setting up a sleek dual-monitor arrangement, and placing your mechanical keyboard just right. But then you step back, and what do you see? A chaotic web of black cords dangling beneath your workspace, hanging like synthetic cobwebs. It ruins the entire look. Beyond the ugly visuals, tangled cords are dust magnets, safety hazards, and major productivity killers. Every time you drop a phone charger behind the desk, you have to go on a fishing expedition under your workspace. Organizing your workspace does not require an engineering degree or a massive budget. With a simple plan and a few affordable tools, you can transform your desk into a clean, distraction-free environment. Here is how to achieve the best cable management for desk setups, step by step. Why Cable Management Actually Matters Before jumping into the solutions, it helps to understand why cord management is worth your time. A clean workspace is not just about showing off on social media—it directly impacts your daily life. Mental Clarity: Clutter in your physical environment leads to mental clutter. A clean sightline helps you focus on work or gaming without passive visual distractions. Device Protection: Cables bent at harsh angles or constantly pulled by gravity wear out much faster. Tidy routing extends the life of your expensive gear. Easier Cleaning: Dust accumulates quickly around tangled wires. Elevating cords off the floor lets you sweep or vacuum underneath in seconds. Safety First: Dangling wires are a tripping hazard for you, and an tempting chew toy for pets. Unplug Everything and Audit Your Setup The biggest mistake people make is trying to organize cables while everything is still plugged in. It simply does not work. You end up wrapping new ties over old knots. Start with a completely blank slate. Unplug every single power brick, display cord, and USB cable. Lay them out on your floor or bed. Ask yourself three questions as you sort through them: Do I actually use this? (If a wire is not attached to an active device, store it in a drawer.) Is this cable too long? (If you have a 10-foot HDMI cable for a monitor sitting two feet from your computer, swap it for a shorter 3-foot version.) Can I go wireless? (A wireless mouse, keyboard, or headset immediately cuts three major wires off your desktop.) Mount the Surge Protector Under Your Desk The fundamental secret to a invisible cable setup is simple: get the power strip off the floor. When your surge protector sits on the floor, every single device wire has to drop down from the desk surface to reach it. This creates a vertical waterfall of mess. Instead, mount your power strip to the underside of your desk. You can do this using heavy-duty double-sided mounting tape, velcro strips, or small screws if your surge protector has keyhole slots on the back. By anchoring the power source directly beneath your workspace, every cord stays hidden underneath, and only one main power cord ever needs to reach the wall outlet. Essential Tools: Trays, Raceways, and Clips To get professional results, you need a few basic accessories. You do not need to buy all of them, but combining two or three will solve almost any routing challenge. Tool Best Used For Installation Difficulty Under-Desk Cable Trays Holding large power bricks, excess wire slack, and power strips Easy to Moderate (Screws or Clamps) J-Channel Raceways Guiding cables horizontally along the back or underside of a desk Very Easy (Adhesive backing) Adhesive Cable Clips Directing single wires (like phone chargers or mouse cords) along fixed paths Very Easy (Peel and stick) Velcro Cable Ties Bundling multiple cords traveling in the same direction Extremely Easy (Reusable) Braided Cable Sleeves Grouping 4-5 wires dropping down to the floor into one neat tube Easy (Zipper or split design) Under-Desk Cable Trays: The Workspace Workhorse If you only buy one tool for your setup, make it an under-desk cable tray or basket. These metal mesh or plastic channels attach to the underside of your desk board. They act as a hidden shelf for all the ugly parts of your setup: bulky laptop power bricks, extra cord lengths, and power strips. Instead of carefully folding every inch of extra cord, you can simply roll up the excess wire and drop it into the tray. Out of sight, out of mind. Wire mesh trays are particularly great because they allow proper airflow around power adapters, preventing heat buildup. Routing Cables Behind the Monitor Monitors are usually the highest point of clutter because they require power and display connections (HDMI or DisplayPort) that hang directly down the wall. To hide these wires: Attach your monitor to a monitor arm. Monitor arms elevate your screen and almost always come with built-in channels or clips inside the arm itself. If using the stock stand, run the cables directly behind the center pillar. Secure them to the back of the stand using small black velcro ties. Keep the wires hugging the back of the monitor stand until they pass below the desk surface. From there, lead them directly into your under-desk tray. Managing Standing Desks (Sit-Stand Setups) If you use an adjustable standing desk, cable management requires one extra rule: you must account for movement. If you tie your cables too tightly while the desk is lowered, raising the desk will yank cords out of your computer or snap port connectors. Leave Slack at the Wall: Ensure the main power cable running from your under-desk surge protector to the wall outlet is long enough to reach comfortably when the desk is at its absolute highest setting. Use a Cable Spine: A flexible cable spine or umbilical sleeve anchors to the bottom of the desk and resting on the floor. It bends smoothly like a spine as the desk rises and lowers, keeping the main vertical drop looking intentional and organized. Why You Should Ditch Plastic Zip Ties It is tempting to grab a pack of cheap plastic zip ties from the hardware store, but avoid them. Zip ties are permanent. The moment you decide to swap your keyboard, buy a new monitor, or adjust your desk layout, you will have to carefully cut through every single zip tie with scissors—risking accidentally slicing your device cords in the process. Always choose reusable Velcro ties or micro-straps instead. They are cheap, hold cords firmly, and take two seconds to undo whenever you need to re-route a single wire. Dealing with Desktop Peripherals and Chargers Not all cables can live underneath the desk. You still need access to phone chargers, headphone cables, and keyboard wires on the top surface. To keep top-of-desk clutter under control: Use Desktop Cable Anchor Clips: Stick small silicone cable anchors near the back edge of your desk. These hold the heads of your charging cables in place so they don't slide off onto the floor when unplugged. Consolidate with a Wireless Charging Pad: Instead of having three separate charging cords for your phone, watch, and earbuds, use a single 3-in-1 wireless charging pad. Consider Coiled Keyboard Cables: If you use a wired mechanical keyboard, a custom coiled cable adds aesthetic appeal while keeping excess length tight and spring-loaded rather than sprawling across your mousepad. Common Cable Management Mistakes to Avoid Even with the best gear, a few common mistakes can ruin your hard work: Pulling Cables Too Tight: Always leave a tiny bit of slack near device ports. Constant tension damages both the cord head and the internal port on your computer or monitor. Mixing Power and Audio Lines: Running unshielded audio cables directly alongside high-voltage power bricks can sometimes cause low electronic buzzing or static interference in your speakers or headphones. Forgetting to Label Devices: Before you bundle ten black cables into a single sleeve, attach small sticky tags or labels to both ends. When you need to unplug a specific display six months from now, you won't have to guess which wire to pull. Maintenance: Keeping it Tidy Long Term Cable management is not a one-and-done event; it is a habit. Over time, you will add a new USB hub, switch your web camera, or plug in temporary devices. To maintain a clean setup: Adopt a "one-in, one-out" rule. If you plug in a new permanent accessory, route its cord properly immediately instead of telling yourself you will do it "later." Do a 5-minute quarterly audit. Every few months, check under the desk to sweep away dust and re-fasten any adhesive clips that might have loosened over time. Final Thought Achieving the best cable management for desk setups isn't about perfection or making every single wire vanish into thin air. It is about creating a clean, functional system that keeps your workspace tidy, safe, and easy to maintain over time. You don't need to do it all in one afternoon either. Start simple: unplug the mess, mount a power strip underneath your desk surface, and bundle loose cords together with velcro straps. You will be amazed at how much larger, cleaner, and more inviting your workspace feels once the wire chaos is gone. Give it a try, and enjoy the instant boost to your daily productivity!

The Ultimate Guide to Desk Cable Management 

We have all been there. You spend hours picking out the perfect desk, setting up a sleek dual-monitor arrangement, and placing your mechanical keyboard just right. But then you step back, and what do you see? A chaotic web of black cords dangling beneath your workspace, hanging like synthetic cobwebs. It ruins the entire look.…
Read more
The Ultimate Guide to Desk Cable Management We have all been there. You spend hours picking out the perfect desk, setting up a sleek dual-monitor arrangement, and placing your mechanical keyboard just right. But then you step back, and what do you see? A chaotic web of black cords dangling beneath your workspace, hanging like synthetic cobwebs. It ruins the entire look. Beyond the ugly visuals, tangled cords are dust magnets, safety hazards, and major productivity killers. Every time you drop a phone charger behind the desk, you have to go on a fishing expedition under your workspace. Organizing your workspace does not require an engineering degree or a massive budget. With a simple plan and a few affordable tools, you can transform your desk into a clean, distraction-free environment. Here is how to achieve the best cable management for desk setups, step by step. Why Cable Management Actually Matters Before jumping into the solutions, it helps to understand why cord management is worth your time. A clean workspace is not just about showing off on social media—it directly impacts your daily life. Mental Clarity: Clutter in your physical environment leads to mental clutter. A clean sightline helps you focus on work or gaming without passive visual distractions. Device Protection: Cables bent at harsh angles or constantly pulled by gravity wear out much faster. Tidy routing extends the life of your expensive gear. Easier Cleaning: Dust accumulates quickly around tangled wires. Elevating cords off the floor lets you sweep or vacuum underneath in seconds. Safety First: Dangling wires are a tripping hazard for you, and an tempting chew toy for pets. Unplug Everything and Audit Your Setup The biggest mistake people make is trying to organize cables while everything is still plugged in. It simply does not work. You end up wrapping new ties over old knots. Start with a completely blank slate. Unplug every single power brick, display cord, and USB cable. Lay them out on your floor or bed. Ask yourself three questions as you sort through them: Do I actually use this? (If a wire is not attached to an active device, store it in a drawer.) Is this cable too long? (If you have a 10-foot HDMI cable for a monitor sitting two feet from your computer, swap it for a shorter 3-foot version.) Can I go wireless? (A wireless mouse, keyboard, or headset immediately cuts three major wires off your desktop.) Mount the Surge Protector Under Your Desk The fundamental secret to a invisible cable setup is simple: get the power strip off the floor. When your surge protector sits on the floor, every single device wire has to drop down from the desk surface to reach it. This creates a vertical waterfall of mess. Instead, mount your power strip to the underside of your desk. You can do this using heavy-duty double-sided mounting tape, velcro strips, or small screws if your surge protector has keyhole slots on the back. By anchoring the power source directly beneath your workspace, every cord stays hidden underneath, and only one main power cord ever needs to reach the wall outlet. Essential Tools: Trays, Raceways, and Clips To get professional results, you need a few basic accessories. You do not need to buy all of them, but combining two or three will solve almost any routing challenge. Tool Best Used For Installation Difficulty Under-Desk Cable Trays Holding large power bricks, excess wire slack, and power strips Easy to Moderate (Screws or Clamps) J-Channel Raceways Guiding cables horizontally along the back or underside of a desk Very Easy (Adhesive backing) Adhesive Cable Clips Directing single wires (like phone chargers or mouse cords) along fixed paths Very Easy (Peel and stick) Velcro Cable Ties Bundling multiple cords traveling in the same direction Extremely Easy (Reusable) Braided Cable Sleeves Grouping 4-5 wires dropping down to the floor into one neat tube Easy (Zipper or split design) Under-Desk Cable Trays: The Workspace Workhorse If you only buy one tool for your setup, make it an under-desk cable tray or basket. These metal mesh or plastic channels attach to the underside of your desk board. They act as a hidden shelf for all the ugly parts of your setup: bulky laptop power bricks, extra cord lengths, and power strips. Instead of carefully folding every inch of extra cord, you can simply roll up the excess wire and drop it into the tray. Out of sight, out of mind. Wire mesh trays are particularly great because they allow proper airflow around power adapters, preventing heat buildup. Routing Cables Behind the Monitor Monitors are usually the highest point of clutter because they require power and display connections (HDMI or DisplayPort) that hang directly down the wall. To hide these wires: Attach your monitor to a monitor arm. Monitor arms elevate your screen and almost always come with built-in channels or clips inside the arm itself. If using the stock stand, run the cables directly behind the center pillar. Secure them to the back of the stand using small black velcro ties. Keep the wires hugging the back of the monitor stand until they pass below the desk surface. From there, lead them directly into your under-desk tray. Managing Standing Desks (Sit-Stand Setups) If you use an adjustable standing desk, cable management requires one extra rule: you must account for movement. If you tie your cables too tightly while the desk is lowered, raising the desk will yank cords out of your computer or snap port connectors. Leave Slack at the Wall: Ensure the main power cable running from your under-desk surge protector to the wall outlet is long enough to reach comfortably when the desk is at its absolute highest setting. Use a Cable Spine: A flexible cable spine or umbilical sleeve anchors to the bottom of the desk and resting on the floor. It bends smoothly like a spine as the desk rises and lowers, keeping the main vertical drop looking intentional and organized. Why You Should Ditch Plastic Zip Ties It is tempting to grab a pack of cheap plastic zip ties from the hardware store, but avoid them. Zip ties are permanent. The moment you decide to swap your keyboard, buy a new monitor, or adjust your desk layout, you will have to carefully cut through every single zip tie with scissors—risking accidentally slicing your device cords in the process. Always choose reusable Velcro ties or micro-straps instead. They are cheap, hold cords firmly, and take two seconds to undo whenever you need to re-route a single wire. Dealing with Desktop Peripherals and Chargers Not all cables can live underneath the desk. You still need access to phone chargers, headphone cables, and keyboard wires on the top surface. To keep top-of-desk clutter under control: Use Desktop Cable Anchor Clips: Stick small silicone cable anchors near the back edge of your desk. These hold the heads of your charging cables in place so they don't slide off onto the floor when unplugged. Consolidate with a Wireless Charging Pad: Instead of having three separate charging cords for your phone, watch, and earbuds, use a single 3-in-1 wireless charging pad. Consider Coiled Keyboard Cables: If you use a wired mechanical keyboard, a custom coiled cable adds aesthetic appeal while keeping excess length tight and spring-loaded rather than sprawling across your mousepad. Common Cable Management Mistakes to Avoid Even with the best gear, a few common mistakes can ruin your hard work: Pulling Cables Too Tight: Always leave a tiny bit of slack near device ports. Constant tension damages both the cord head and the internal port on your computer or monitor. Mixing Power and Audio Lines: Running unshielded audio cables directly alongside high-voltage power bricks can sometimes cause low electronic buzzing or static interference in your speakers or headphones. Forgetting to Label Devices: Before you bundle ten black cables into a single sleeve, attach small sticky tags or labels to both ends. When you need to unplug a specific display six months from now, you won't have to guess which wire to pull. Maintenance: Keeping it Tidy Long Term Cable management is not a one-and-done event; it is a habit. Over time, you will add a new USB hub, switch your web camera, or plug in temporary devices. To maintain a clean setup: Adopt a "one-in, one-out" rule. If you plug in a new permanent accessory, route its cord properly immediately instead of telling yourself you will do it "later." Do a 5-minute quarterly audit. Every few months, check under the desk to sweep away dust and re-fasten any adhesive clips that might have loosened over time. Final Thought Achieving the best cable management for desk setups isn't about perfection or making every single wire vanish into thin air. It is about creating a clean, functional system that keeps your workspace tidy, safe, and easy to maintain over time. You don't need to do it all in one afternoon either. Start simple: unplug the mess, mount a power strip underneath your desk surface, and bundle loose cords together with velcro straps. You will be amazed at how much larger, cleaner, and more inviting your workspace feels once the wire chaos is gone. Give it a try, and enjoy the instant boost to your daily productivity!

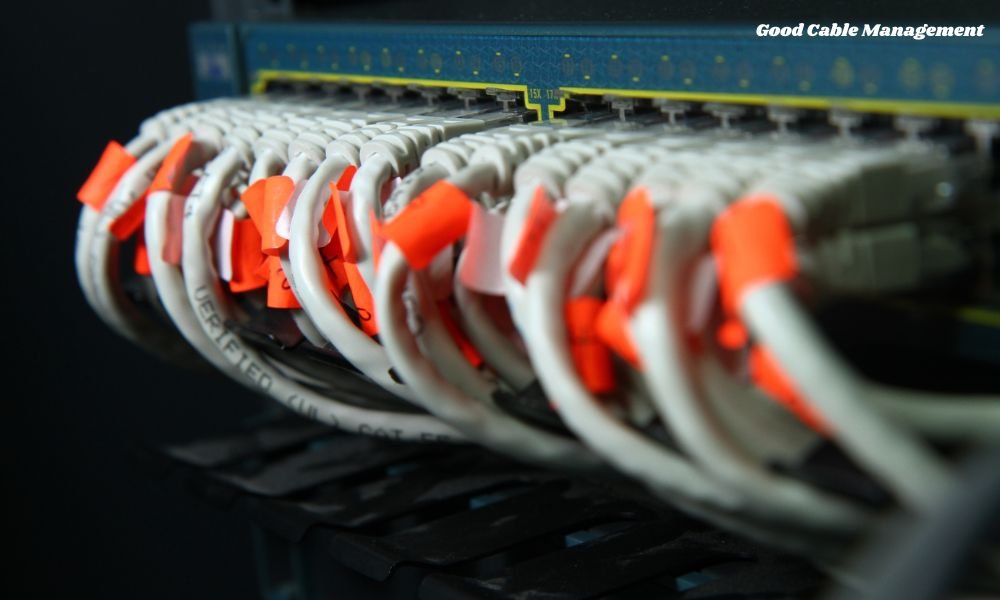
How to have good cable management

Building or upgrading a desktop computer is an exciting project, but there is one crucial step that many people overlook: organizing the wires. A tangle of cables inside and outside your computer case isn’t just an eyesore; it can actively hinder your system’s performance, make upgrades a headache, and trap dust over time. Mastering how…

Read more
Scroll to Top