
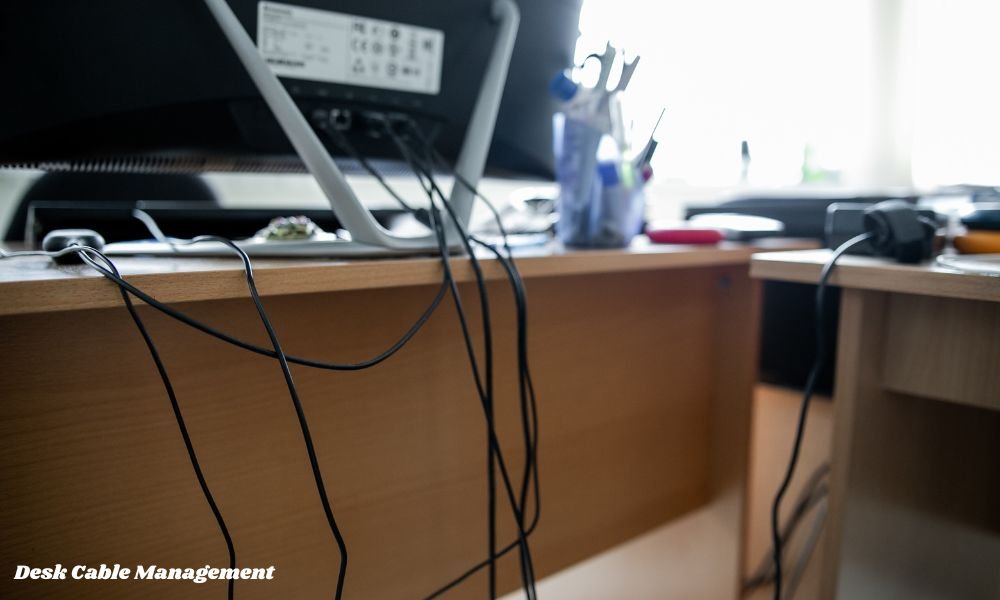
We have all been there. You spend hours picking out the perfect desk, setting up a sleek dual-monitor arrangement, and placing your mechanical keyboard just right. But then you step back, and what do you see? A chaotic web of black cords dangling beneath your workspace, hanging like synthetic cobwebs.
It ruins the entire look. Beyond the ugly visuals, tangled cords are dust magnets, safety hazards, and major productivity killers. Every time you drop a phone charger behind the desk, you have to go on a fishing expedition under your workspace.
Organizing your workspace does not require an engineering degree or a massive budget. With a simple plan and a few affordable tools, you can transform your desk into a clean, distraction-free environment. Here is how to achieve the best cable management for desk setups, step by step.
Why Cable Management Actually Matters
Before jumping into the solutions, it helps to understand why cord management is worth your time. A clean workspace is not just about showing off on social media—it directly impacts your daily life.
- Mental Clarity: Clutter in your physical environment leads to mental clutter. A clean sightline helps you focus on work or gaming without passive visual distractions.
- Device Protection: Cables bent at harsh angles or constantly pulled by gravity wear out much faster. Tidy routing extends the life of your expensive gear.
- Easier Cleaning: Dust accumulates quickly around tangled wires. Elevating cords off the floor lets you sweep or vacuum underneath in seconds.
- Safety First: Dangling wires are a tripping hazard for you, and an tempting chew toy for pets.
Unplug Everything and Audit Your Setup
The biggest mistake people make is trying to organize cables while everything is still plugged in. It simply does not work. You end up wrapping new ties over old knots.
Start with a completely blank slate. Unplug every single power brick, display cord, and USB cable. Lay them out on your floor or bed.
Ask yourself three questions as you sort through them:
- Do I actually use this? (If a wire is not attached to an active device, store it in a drawer.)
- Is this cable too long? (If you have a 10-foot HDMI cable for a monitor sitting two feet from your computer, swap it for a shorter 3-foot version.)
- Can I go wireless? (A wireless mouse, keyboard, or headset immediately cuts three major wires off your desktop.)
Mount the Surge Protector Under Your Desk
The fundamental secret to a invisible cable setup is simple: get the power strip off the floor. When your surge protector sits on the floor, every single device wire has to drop down from the desk surface to reach it. This creates a vertical waterfall of mess.
Instead, mount your power strip to the underside of your desk. You can do this using heavy-duty double-sided mounting tape, velcro strips, or small screws if your surge protector has keyhole slots on the back. By anchoring the power source directly beneath your workspace, every cord stays hidden underneath, and only one main power cord ever needs to reach the wall outlet.
Essential Tools: Trays, Raceways, and Clips
To get professional results, you need a few basic accessories. You do not need to buy all of them, but combining two or three will solve almost any routing challenge.
| Tool | Best Used For | Installation Difficulty |
| Under-Desk Cable Trays | Holding large power bricks, excess wire slack, and power strips | Easy to Moderate (Screws or Clamps) |
| J-Channel Raceways | Guiding cables horizontally along the back or underside of a desk | Very Easy (Adhesive backing) |
| Adhesive Cable Clips | Directing single wires (like phone chargers or mouse cords) along fixed paths | Very Easy (Peel and stick) |
| Velcro Cable Ties | Bundling multiple cords traveling in the same direction | Extremely Easy (Reusable) |
| Braided Cable Sleeves | Grouping 4-5 wires dropping down to the floor into one neat tube | Easy (Zipper or split design) |
Under-Desk Cable Trays: The Workspace Workhorse
If you only buy one tool for your setup, make it an under-desk cable tray or basket.
These metal mesh or plastic channels attach to the underside of your desk board. They act as a hidden shelf for all the ugly parts of your setup: bulky laptop power bricks, extra cord lengths, and power strips.
Instead of carefully folding every inch of extra cord, you can simply roll up the excess wire and drop it into the tray. Out of sight, out of mind. Wire mesh trays are particularly great because they allow proper airflow around power adapters, preventing heat buildup.
Routing Cables Behind the Monitor
Monitors are usually the highest point of clutter because they require power and display connections (HDMI or DisplayPort) that hang directly down the wall.
To hide these wires:
- Attach your monitor to a monitor arm. Monitor arms elevate your screen and almost always come with built-in channels or clips inside the arm itself.
- If using the stock stand, run the cables directly behind the center pillar. Secure them to the back of the stand using small black velcro ties.
- Keep the wires hugging the back of the monitor stand until they pass below the desk surface. From there, lead them directly into your under-desk tray.
Managing Standing Desks (Sit-Stand Setups)
If you use an adjustable standing desk, cable management requires one extra rule: you must account for movement.
If you tie your cables too tightly while the desk is lowered, raising the desk will yank cords out of your computer or snap port connectors.
- Leave Slack at the Wall: Ensure the main power cable running from your under-desk surge protector to the wall outlet is long enough to reach comfortably when the desk is at its absolute highest setting.
- Use a Cable Spine: A flexible cable spine or umbilical sleeve anchors to the bottom of the desk and resting on the floor. It bends smoothly like a spine as the desk rises and lowers, keeping the main vertical drop looking intentional and organized.
Why You Should Ditch Plastic Zip Ties
It is tempting to grab a pack of cheap plastic zip ties from the hardware store, but avoid them.
Zip ties are permanent. The moment you decide to swap your keyboard, buy a new monitor, or adjust your desk layout, you will have to carefully cut through every single zip tie with scissors—risking accidentally slicing your device cords in the process.
Always choose reusable Velcro ties or micro-straps instead. They are cheap, hold cords firmly, and take two seconds to undo whenever you need to re-route a single wire.
Dealing with Desktop Peripherals and Chargers
Not all cables can live underneath the desk. You still need access to phone chargers, headphone cables, and keyboard wires on the top surface.
To keep top-of-desk clutter under control:
- Use Desktop Cable Anchor Clips: Stick small silicone cable anchors near the back edge of your desk. These hold the heads of your charging cables in place so they don’t slide off onto the floor when unplugged.
- Consolidate with a Wireless Charging Pad: Instead of having three separate charging cords for your phone, watch, and earbuds, use a single 3-in-1 wireless charging pad.
- Consider Coiled Keyboard Cables: If you use a wired mechanical keyboard, a custom coiled cable adds aesthetic appeal while keeping excess length tight and spring-loaded rather than sprawling across your mousepad.
Common Cable Management Mistakes to Avoid
Even with the best gear, a few common mistakes can ruin your hard work:
- Pulling Cables Too Tight: Always leave a tiny bit of slack near device ports. Constant tension damages both the cord head and the internal port on your computer or monitor.
- Mixing Power and Audio Lines: Running unshielded audio cables directly alongside high-voltage power bricks can sometimes cause low electronic buzzing or static interference in your speakers or headphones.
- Forgetting to Label Devices: Before you bundle ten black cables into a single sleeve, attach small sticky tags or labels to both ends. When you need to unplug a specific display six months from now, you won’t have to guess which wire to pull.
Maintenance: Keeping it Tidy Long Term
Cable management is not a one-and-done event; it is a habit. Over time, you will add a new USB hub, switch your web camera, or plug in temporary devices.
To maintain a clean setup:
- Adopt a “one-in, one-out” rule. If you plug in a new permanent accessory, route its cord properly immediately instead of telling yourself you will do it “later.”
- Do a 5-minute quarterly audit. Every few months, check under the desk to sweep away dust and re-fasten any adhesive clips that might have loosened over time.
Final Thought
Achieving the best cable management for desk setups isn’t about perfection or making every single wire vanish into thin air. It is about creating a clean, functional system that keeps your workspace tidy, safe, and easy to maintain over time.
You don’t need to do it all in one afternoon either. Start simple: unplug the mess, mount a power strip underneath your desk surface, and bundle loose cords together with velcro straps. You will be amazed at how much larger, cleaner, and more inviting your workspace feels once the wire chaos is gone. Give it a try, and enjoy the instant boost to your daily productivity!